Advanced
If you are interested in contributing to Mocky Balboa, or just want to learn more about how it works then read on! If you're looking to just get started, then go back to the Getting Started page.
Sequence flow diagram for server-side requests
Below is a sequence flow diagram that illustrates the flow of a test in a browser automation framework interacting with your application server. The diagram shows what happens when the application server makes an outbound HTTP request to an external API and how the response is processed by the Mocky Balboa server and client.
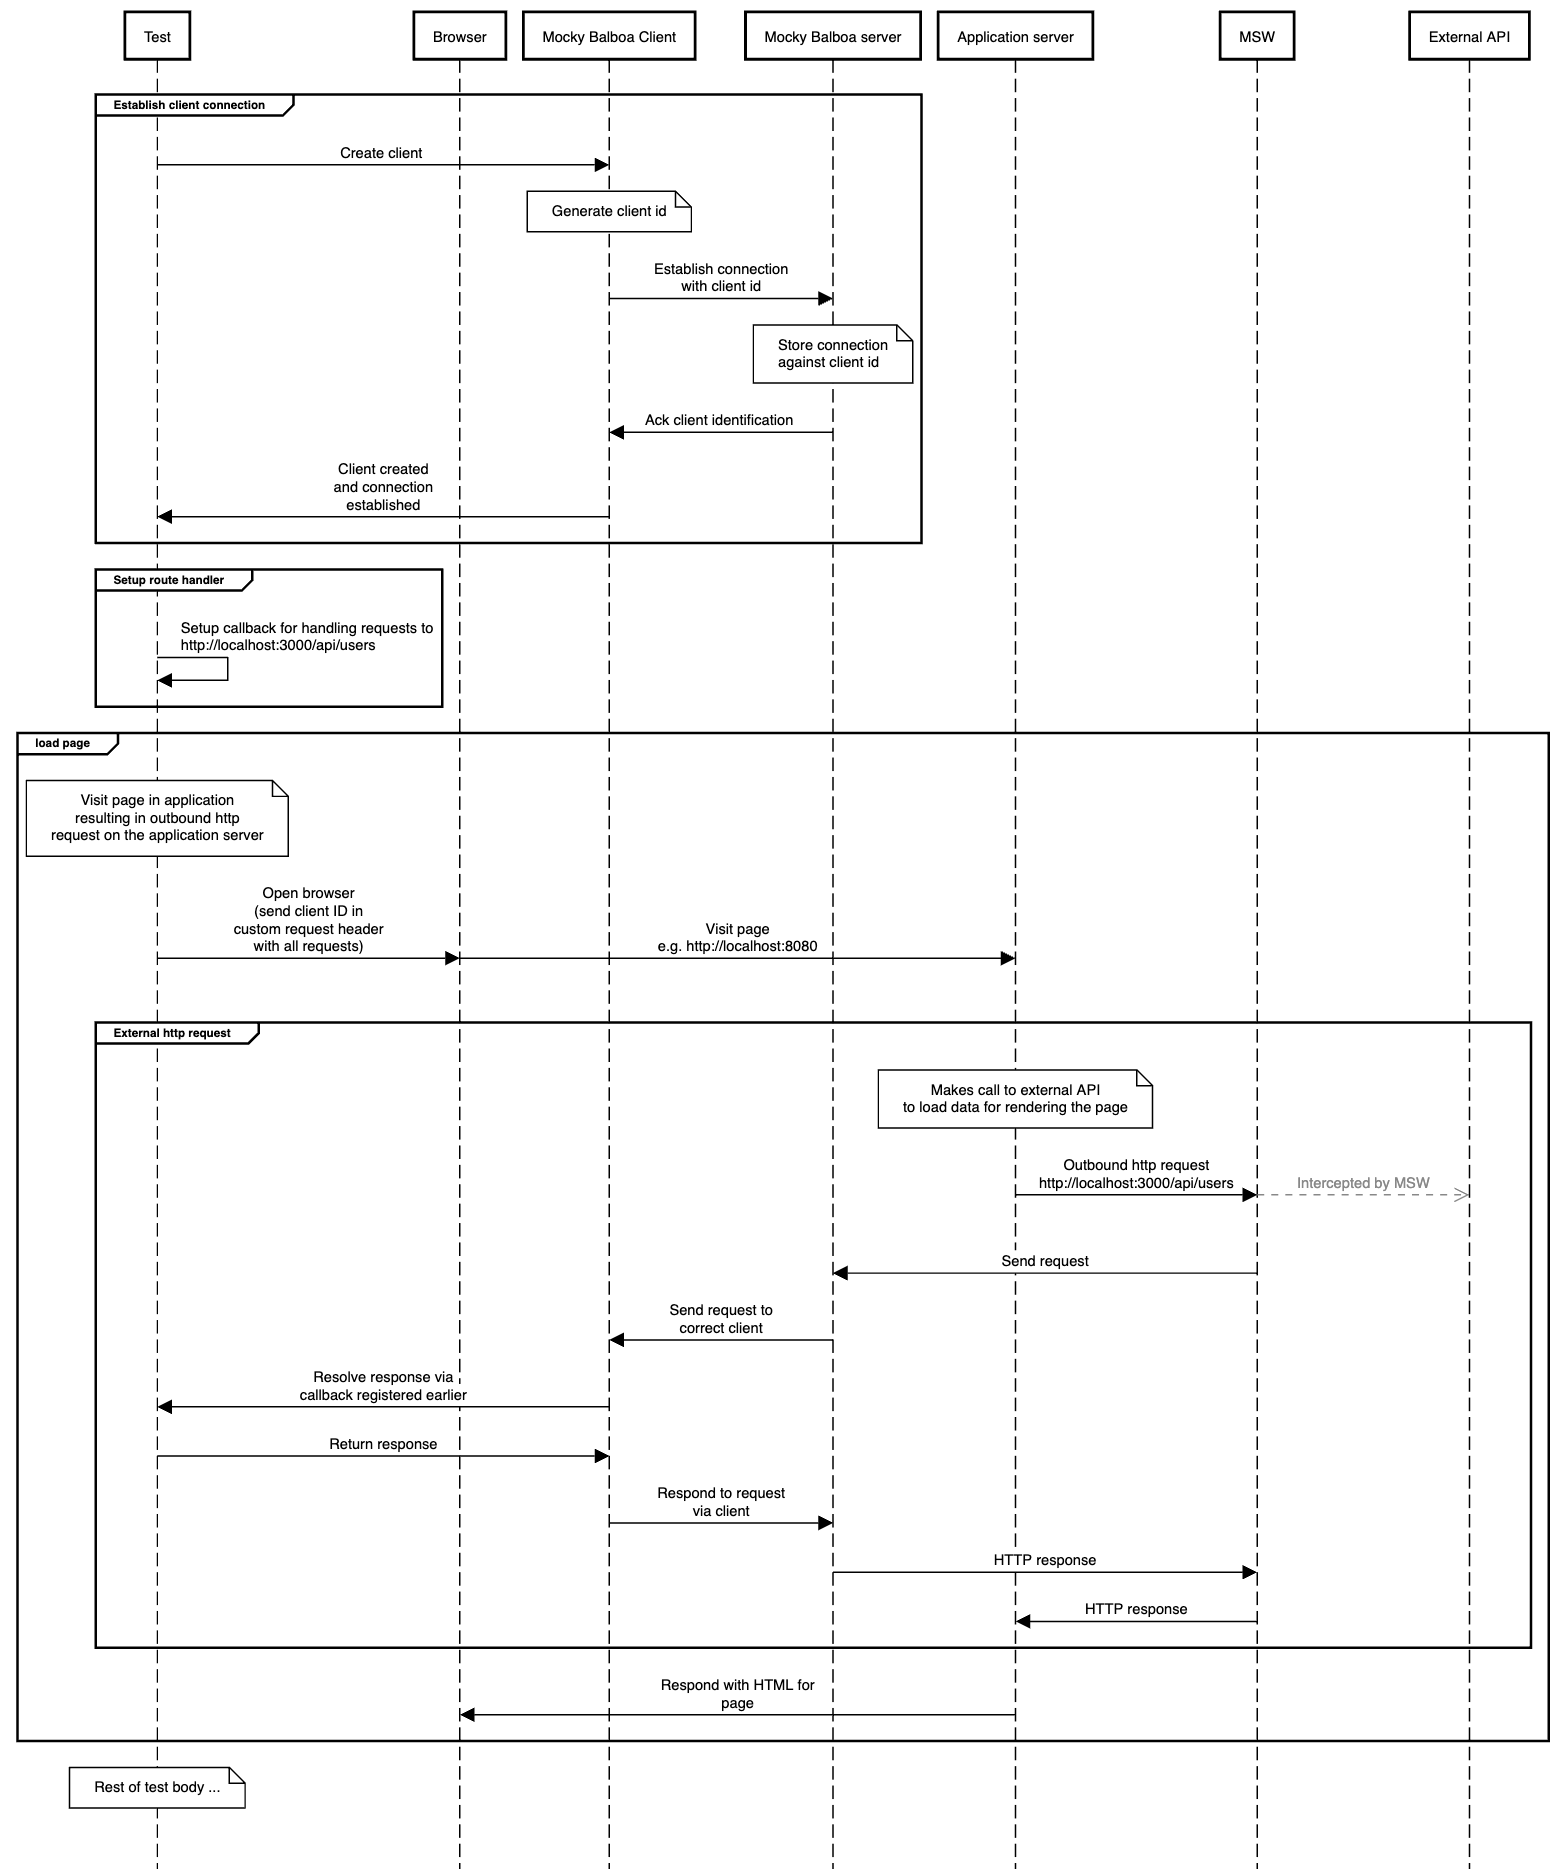
There's a lot going on here, but don't worry, we'll break it down step by step.
Step 1: Establishing a connection to the Mocky Balboa server
The first step in our test is to establish a connection to the Mocky Balboa server. This is done by creating a new instance of the Mocky Balboa client and calling the connect method. This is all abstracted away from the user via the first class integrations. Here's how it looks in the Playwright integration:
- TypeScript
- JavaScript
import { test } from "@playwright/test";
import { createClient } from "@mocky-balboa/playwright";

test("my page loads", async ({ context, page }) => {
    const client = await createClient(context);
});
import { test } from "@playwright/test";
import { createClient } from "@mocky-balboa/playwright";

test("my page loads", async ({ context, page }) => {
  const client = await createClient(context);
});
Behind the abstraction we're doing a couple of things:
- We're creating a new instance of the Mocky Balboa client
import { Client } from "@mocky-balboa/client";. - We're calling the
connectmethod on the client. - We're setting extra HTTP headers on the Playwright browser context. This is how we match outbound requests to the client that initiated the request.
Step 2: Register our network fixture
Next we're going to fixture our external API call that's going to be triggered when we try to load our page. We'll do this directly on the client:
- TypeScript
- JavaScript
client.route("**/api/users", (route) => {
  return route.fulfill({
    status: 200,
    body: JSON.stringify([
      { id: "user-1", name: "John Doe" },
      { id: "user-2", name: "Jane Doe" }
    ]),
    headers: {
      "Content-Type": "application/json"
    },
  });
});
client.route("**/api/users", (route) => {
  return route.fulfill({
    status: 200,
    body: JSON.stringify([
      { id: "user-1", name: "John Doe" },
      { id: "user-2", name: "Jane Doe" }
    ]),
    headers: {
      "Content-Type": "application/json"
    },
  });
});
This is the code that's going to be executed when our application server tries to fetch on our http://localhost:3000/api/users endpoint.
Step 3: Now we can load our page
- TypeScript
- JavaScript
await page.goto("http://localhost:8080");
await page.goto("http://localhost:8080");
This will trigger our call to the http://localhost:8080/api/users endpoint. Mock Service Worker (MSW) will intercept the request and delegate resolving the response to the client.
Step 4: Write the test assertions
The rest of your test will then execute. Once the browser context has been closed, the client will be disconnected.
How does it work?
The real magic happens inside our server. We wrap the application server in a parent process that's responsible for also spinning up the Mocky Balboa WebSocket server. We run the handler for the application server in an AsyncLocalStorage callback. The trace for this storage is set to the client ID, the one we passed to the server via the custom header. This is the glue which ensures the server sends messages to the correct client allowing us to run our tests in parallel.